Spam Filter User Guide
Ver. 2022.03.28
Contents
Modifying
Mail History Display Settings
Login
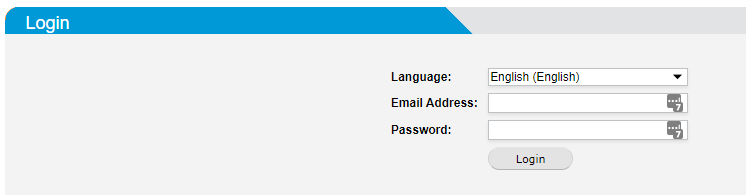
To log in, enter your full email address and password and click Login button.
2-factor login

If you have 2-factor authentication enabled, it will ask you for your code.
(On
first login you will not have this prompt. How to setup 2-factor is listed
below)
Managing Quarantine Email
Go to Quarantine > Manage Quarantine. Use Search Filters and
Display Settings to manage the list of emails in quarantine.
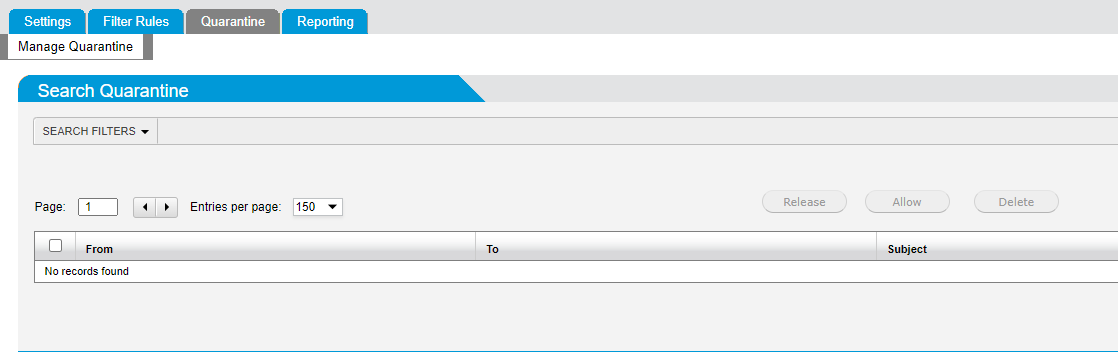
Messages
will reside in quarantine for 30 days after that they are deleted from
quarantine.
The following actions can be performed on email in
quarantine:
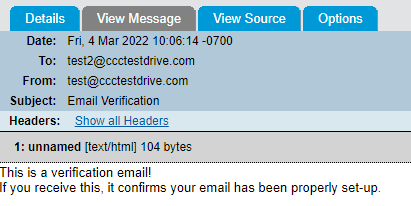
View Message
Click any message in quarantine to view it in a separate window. Click on
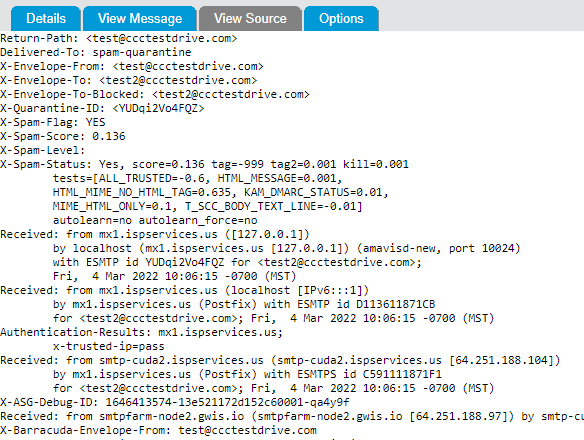
one of the four tabs to view more information on the quarantined email -
Details, View Message, View Source, and Options.
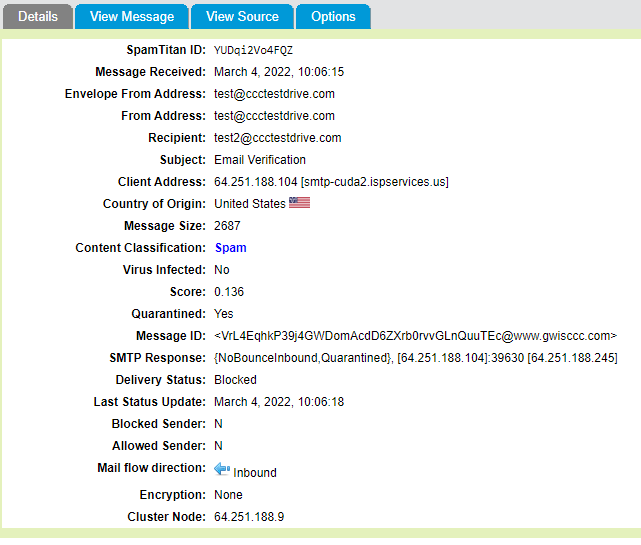
All images are blocked in review to prevent possible
inappropriate content. If a message is subsequently released and delivered then
the original images will be present.
Release
Message
On a rare occasion, an email in quarantine may have been incorrectly identified
as spam. This is known as a ‘false positive’. To release a message, click the
checkbox to the left of the email address and click the Release button. This
will automatically forward the email to the recipient.
Allow a Sender
To add the email address of an email in quarantine to your Allow List,
click the checkbox to the left of the email address and click the Allow button.
The email address then is added to the email recipients allow list and the
email is released from quarantine and delivered to the recipient.
Delete Message
To delete a message, click the checkbox to the left of the email address
and click the Delete button. Delete multiple messages at the same time by
selecting several email addresses at once before clicking Delete.
Change User Password
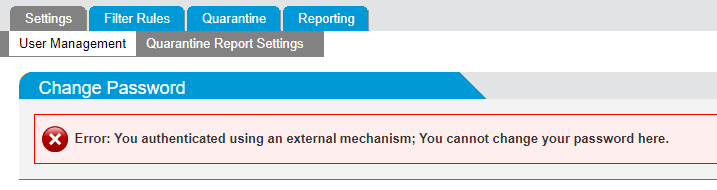
Your email credentials are synced with the filter so you will not be able to change your password from the filter.
Two factor authentication
Two-factor authentication (2FA) is an additional layer of
security used to protect your mail filter account from unauthorized access. If
2FA is enabled, a user provides their username and password on login and then
must also provide an additional piece of information known only to them. This
additional piece of information is a one-time password, regenerated every
thirty seconds.
Go to Settings > User Management > Two-Factor Authentication (2FA) to manage 2FA settings.
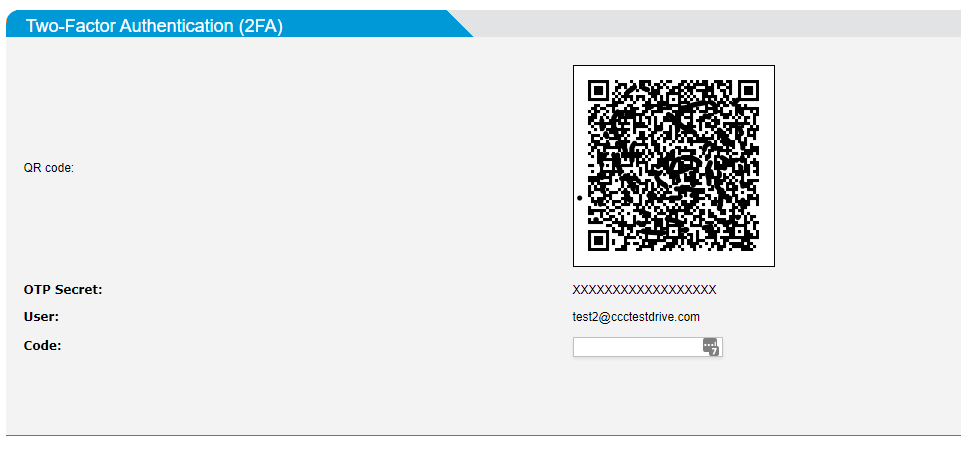
Follow the steps below to set up two-factor authentication:
1. Before continuing, you must download and install an authenticator phone app, e.g., Google Authenticator or FreeOTP.
2. Scan the QR code using the authenticator app installed in step 1.

If you are unable to scan the QR code, manually enter
the OTP (One Time Password) secret provided in the OTP Secret: field.
3. In the Code: field, enter the code generated from the authenticator phone app.
4. Click Register.
Recovery Codes
A set of recovery codes are generated when 2FA is enabled. Store these codes
carefully as they are the only way to access your mail filter account if the
device you registered 2FA on is lost.
The recovery codes are one-time use, and they must be used in sequential order.
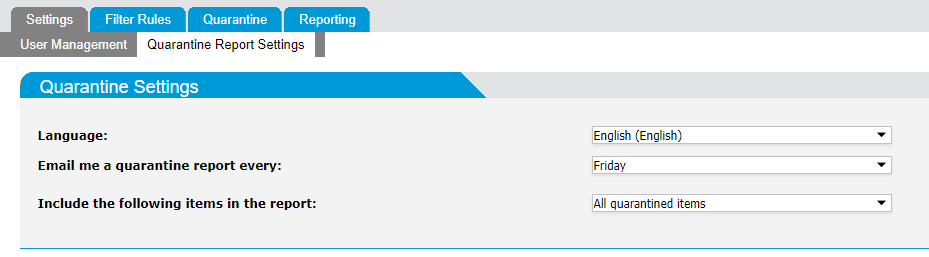
Quarantine Report Settings
This page allows you to manage the language, frequency, and
content of your own Quarantine Report.
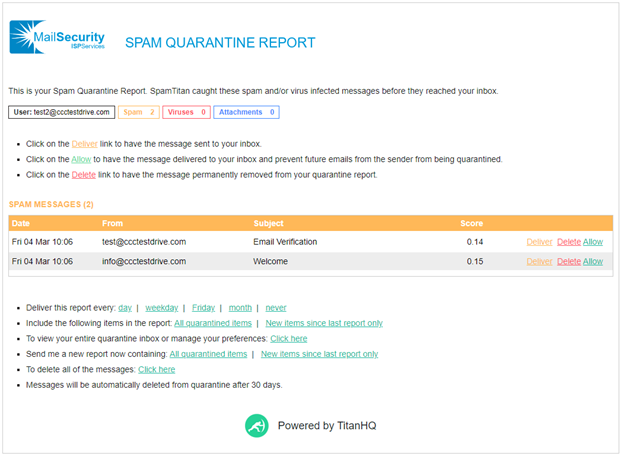
Spam Quarantine Report
A quarantine report contains a list of emails that have been
caught and quarantined. Users can directly manage their quarantined mail
through these reports, which are emailed to them on a periodic basis.
A quarantine report provides links for a user to manage
their quarantined emails directly from the report. See a sample quarantine
report below.
User Block List
Go to Filter Rules > User
Block List to manage block list entries.
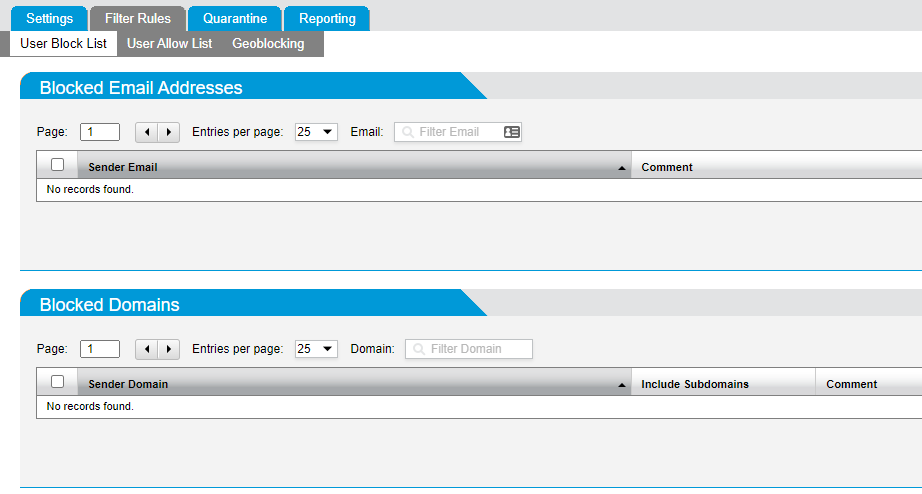
If you Block an address
or domain, then mail from that address or domain to your account will be
blocked before it reaches your inbox.
Adding
a Block List Entry
1. Go to Filter Rules > Block List > Blocked Email Addresses to add an email address to the block list or go to Filter Rules > Block List > Blocked Domains to add a domain.
2. Click Add... and the Add window displays.
3. Enter the Sender Email: in the form of user@example.com or Sender Domain: in the form of example.com.
4. For a domain entry, check Include Subdomains: for subdomains to also be blocked.
5. Enter any optional comments in the Comments: field.
6. Click Save.
Deleting a Block List Entry
1.
To delete an individual email address or domain,
click the delete ![]() icon in the Options column to the right of the
listing. To delete multiple entries at once, check the box
icon in the Options column to the right of the
listing. To delete multiple entries at once, check the box ![]() to the left of the listings you want to
delete.
to the left of the listings you want to
delete.
2. Click Delete… under Blocked Email Addresses or Blocked Domains.
Importing Block List Entries
1. Create a single text file containing the entries to import. Both email addresses and domains can be imported together from the same text file. The file must have one email address or domain (preceded by the '@' sign) per line. For example:
· john@example.com
· @example.com
2. Click Import… and select the text file to import. Click Open.
3. Email addresses will be imported to the Blocked Email Addresses and domains will be imported to the Blocked Domains.
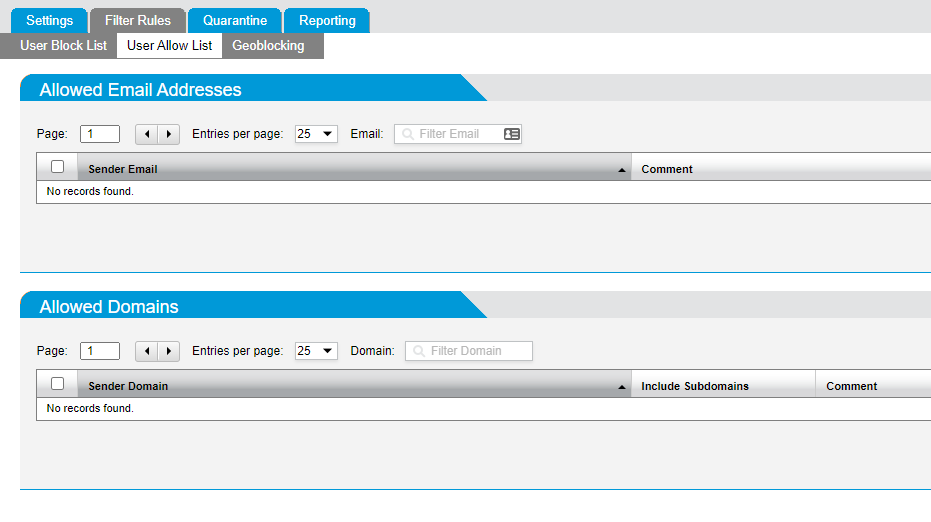
User Allow List
No spam checking is performed for domains or email addresses
that are added to an allow list, they are automatically forwarded to the
recipient.
Go to Filter Rules > Allow List to manage allow list entries.
If
you Allow a particular email address or domain then all mail from that user, or
that domain to your account will be passed through by the Spam Filter with no
questions - even if the message were recognized as spam. In effect it will
bypass the spam filters.
Adding an Allow List Entry
1. Go to Filter Rules > Allow List > Allowed Email Addresses to add an email address to the allow list or go to Filter Rules > Allow List > Allowed Domains to add a domain.
2. Enter a Sender Email: in the form of user@example.com or Sender Domain: in the form of example.com.
3. Enter Comments: as required.
4. Click Save.
Deleting an Allow List Entry
1.
To delete an individual email address or domain,
click the ![]() icon in the Options column to the right of the
listing. To delete multiple entries at once, check the box
icon in the Options column to the right of the
listing. To delete multiple entries at once, check the box ![]() to the left of the listings you want to
delete.
to the left of the listings you want to
delete.
2. Click Delete… under Allowed Email Addresses or Allowed Domains.
Importing Allow List Entries
1. Create a single text file with all the entries to import. Both email addresses and domains can be imported together from the same text file. The file must have one email address or domain (preceded by the '@' sign) per line. For example:
o john@example.com
o @example.com
2. Click Import… to select the text file. Click Open.
Geoblocking
Geoblocking restricts email based on a sender's geographic location,
which is identified by the sending server's IP address.
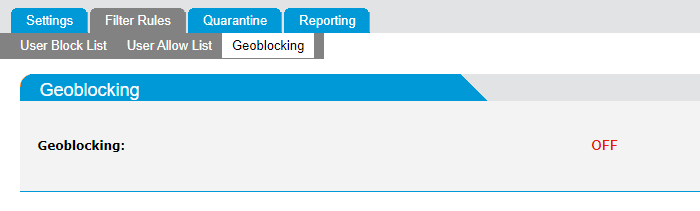
Geoblocking
is off by default to turn it on click “Enable”.
Go to Filter Rules > Geoblocking and follow the steps below to add a
geoblocking rule for a country.
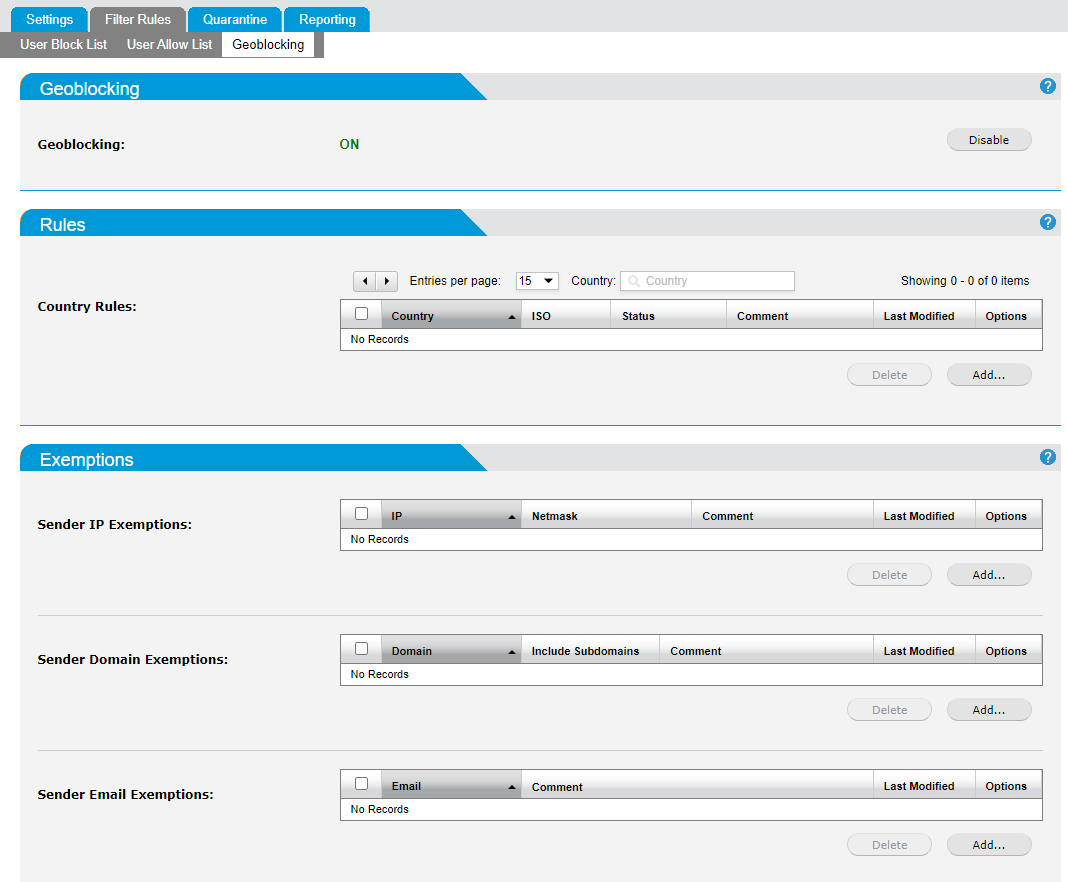
1. Click Enable to turn Policy Based Geoblocking: ON (default: disabled).
2. Click Add... and the Add Geoblocking Rule window displays.
o Country: Select a country to allow or block. This field auto-populates as you type.
o Status: Select Allow or Block to allow/block the country you selected.
o Comment: Enter an optional description of this geoblocking rule.
3. Click Save to save this geoblocking rule or cancel to discard.
Once a geoblocking rule has been added, it can be edited or
deleted. Click the edit ![]() icon to edit a rule or click the
icon to edit a rule or click the ![]() delete icon to delete a rule.
delete icon to delete a rule.
Mail History
The mail filter keeps a record of all mail that it processes. This information is available in Reporting > History.
Click the Refresh button to refresh the history list.
To view mail history by date, click the Date Range button and select from the list of available options. Choose Custom Date range... to set your own date range.
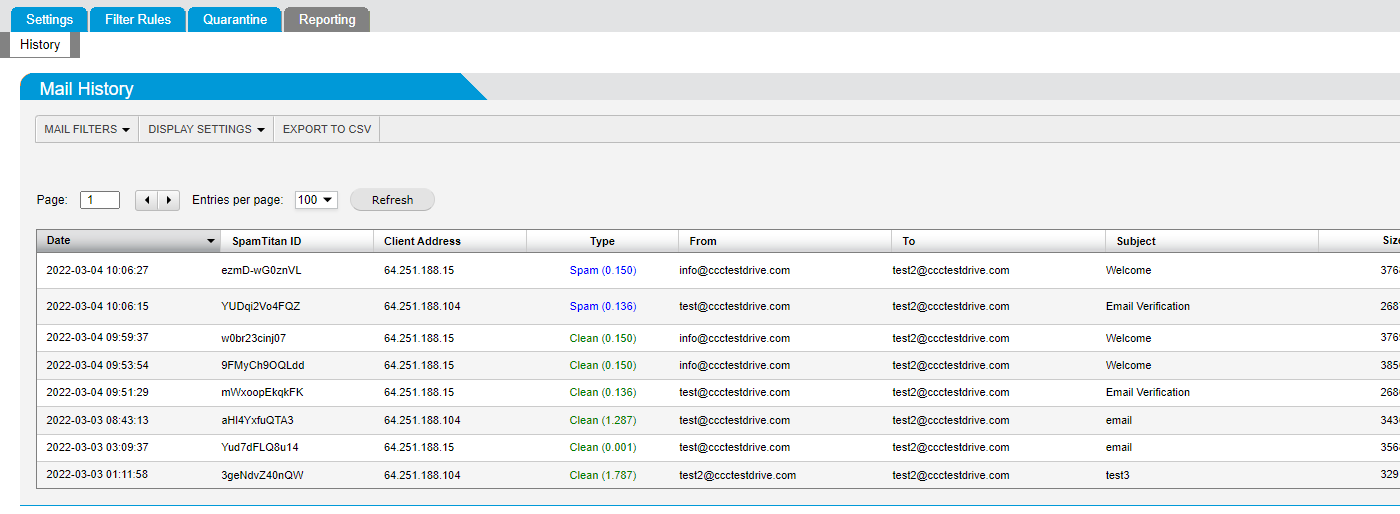
History contains the following information about each email. Click an email in the list to show more.
If a
message type is clean this mail can be redelivered to the user’s mailbox for a
period of 30 days.
This will allow the user to “restore” an email they have deleted from their
inbox.
Details
o Date: date and time the email was received.
o Msg ID: a unique internal message identification number that the mail filter assigns to each email (also known as SpamTitan ID). Click to view extended details on an email:
o Client Address: source IP address a mail was received from.
o Type: message type as classified by the mail filter, e.g., Clean, Spam, RBL Reject, SPF Reject, etc.
o From: sender email address.
o To: recipient email address.
o Subject: subject header of the received message.
o Size: size of the message.
o
Flow: The direction of the message (Inbound ![]() , Outbound
, Outbound ![]() or Internal
or Internal ![]() ).
).
o TLS: indicates if TLS (Transport Layer Security) was applied to the message.
o Delivery: Indicates the delivery status of a message (Sent/Deferred/Bounced).
o Delivery Response: This shows the SMTP response from the destination server. This can be useful to indicate, for example, why a remote server rejected a message.
View Message
This will show the contents of the email.
View Source
This shows specific header information for the email. (Useful for troubleshooting mail issues)
. 
Options
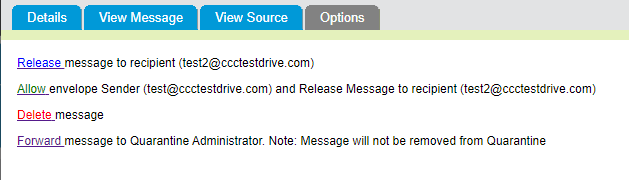
o Release: Delivers the mail to the inbox, mail can be redelivered to the user’s mailbox for a period of 30 days.
o Allow: Adds the email sender to you allow list and delivers the mail to the inbox.
o Delete: Removes the message from the filter.
o Mark message as spam: Marks the message in the filter as spam.
Modifying Mail History Display Settings
Go to Reporting > History > Display Settings to control what columns are displayed in your Mail History.
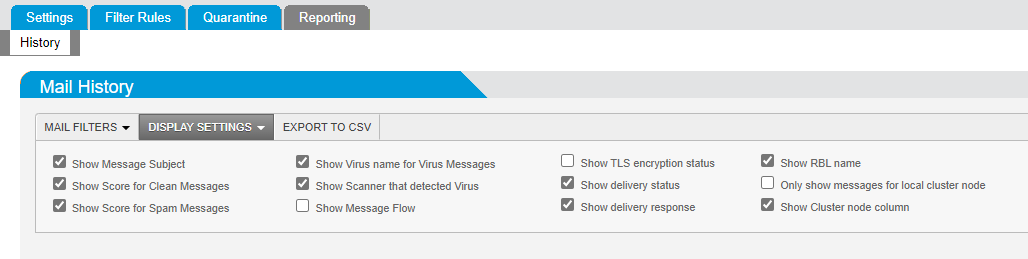
Important
As the mail filter runs over
multiple systems, it is recommended to un-check ‘only show messages from local
cluster node’. Otherwise, you may only see 30% of your mail reported.
o The following Display Settings can be checked or unchecked:
o Show Message Subject: Display the subject of the message.
o Show Score for Clean Messages: If enabled, the score assigned by the mail filter will be displayed in the Type column of the history view for messages classified as Clean.
o Show Score for Spam Messages: If enabled, the score assigned by the mail filter will be displayed in the Type column of the history view for messages classified as Spam.
o Show Virus name for Virus Messages: If enabled, then the name of the virus that the virus scanner detected will be displayed in the Type column of the history view for virus messages.
o Show Scanner that detected Virus: If enabled, then the name(s) of the virus scanner(s) that detected the virus will be display in the Type column of the history view for virus messages.
o Show Message Flow: Show in which direction the Message is coming from and going to.
o Show TLS encryption status: Show the status of the Transport Layer Security (TLS).
o Show delivery status: Show Delivery Status of the message.
o Show delivery response: Show SMTP response from destination server.
o Show RBL name: Show the name of the RBL that blocked the message.
o Only show messages for local cluster node: Clicking this option will mean that only messages for the local cluster node are displayed (see Important note above).
o Show Cluster node column: This will enable the user to see a cluster node column on the table displayed.